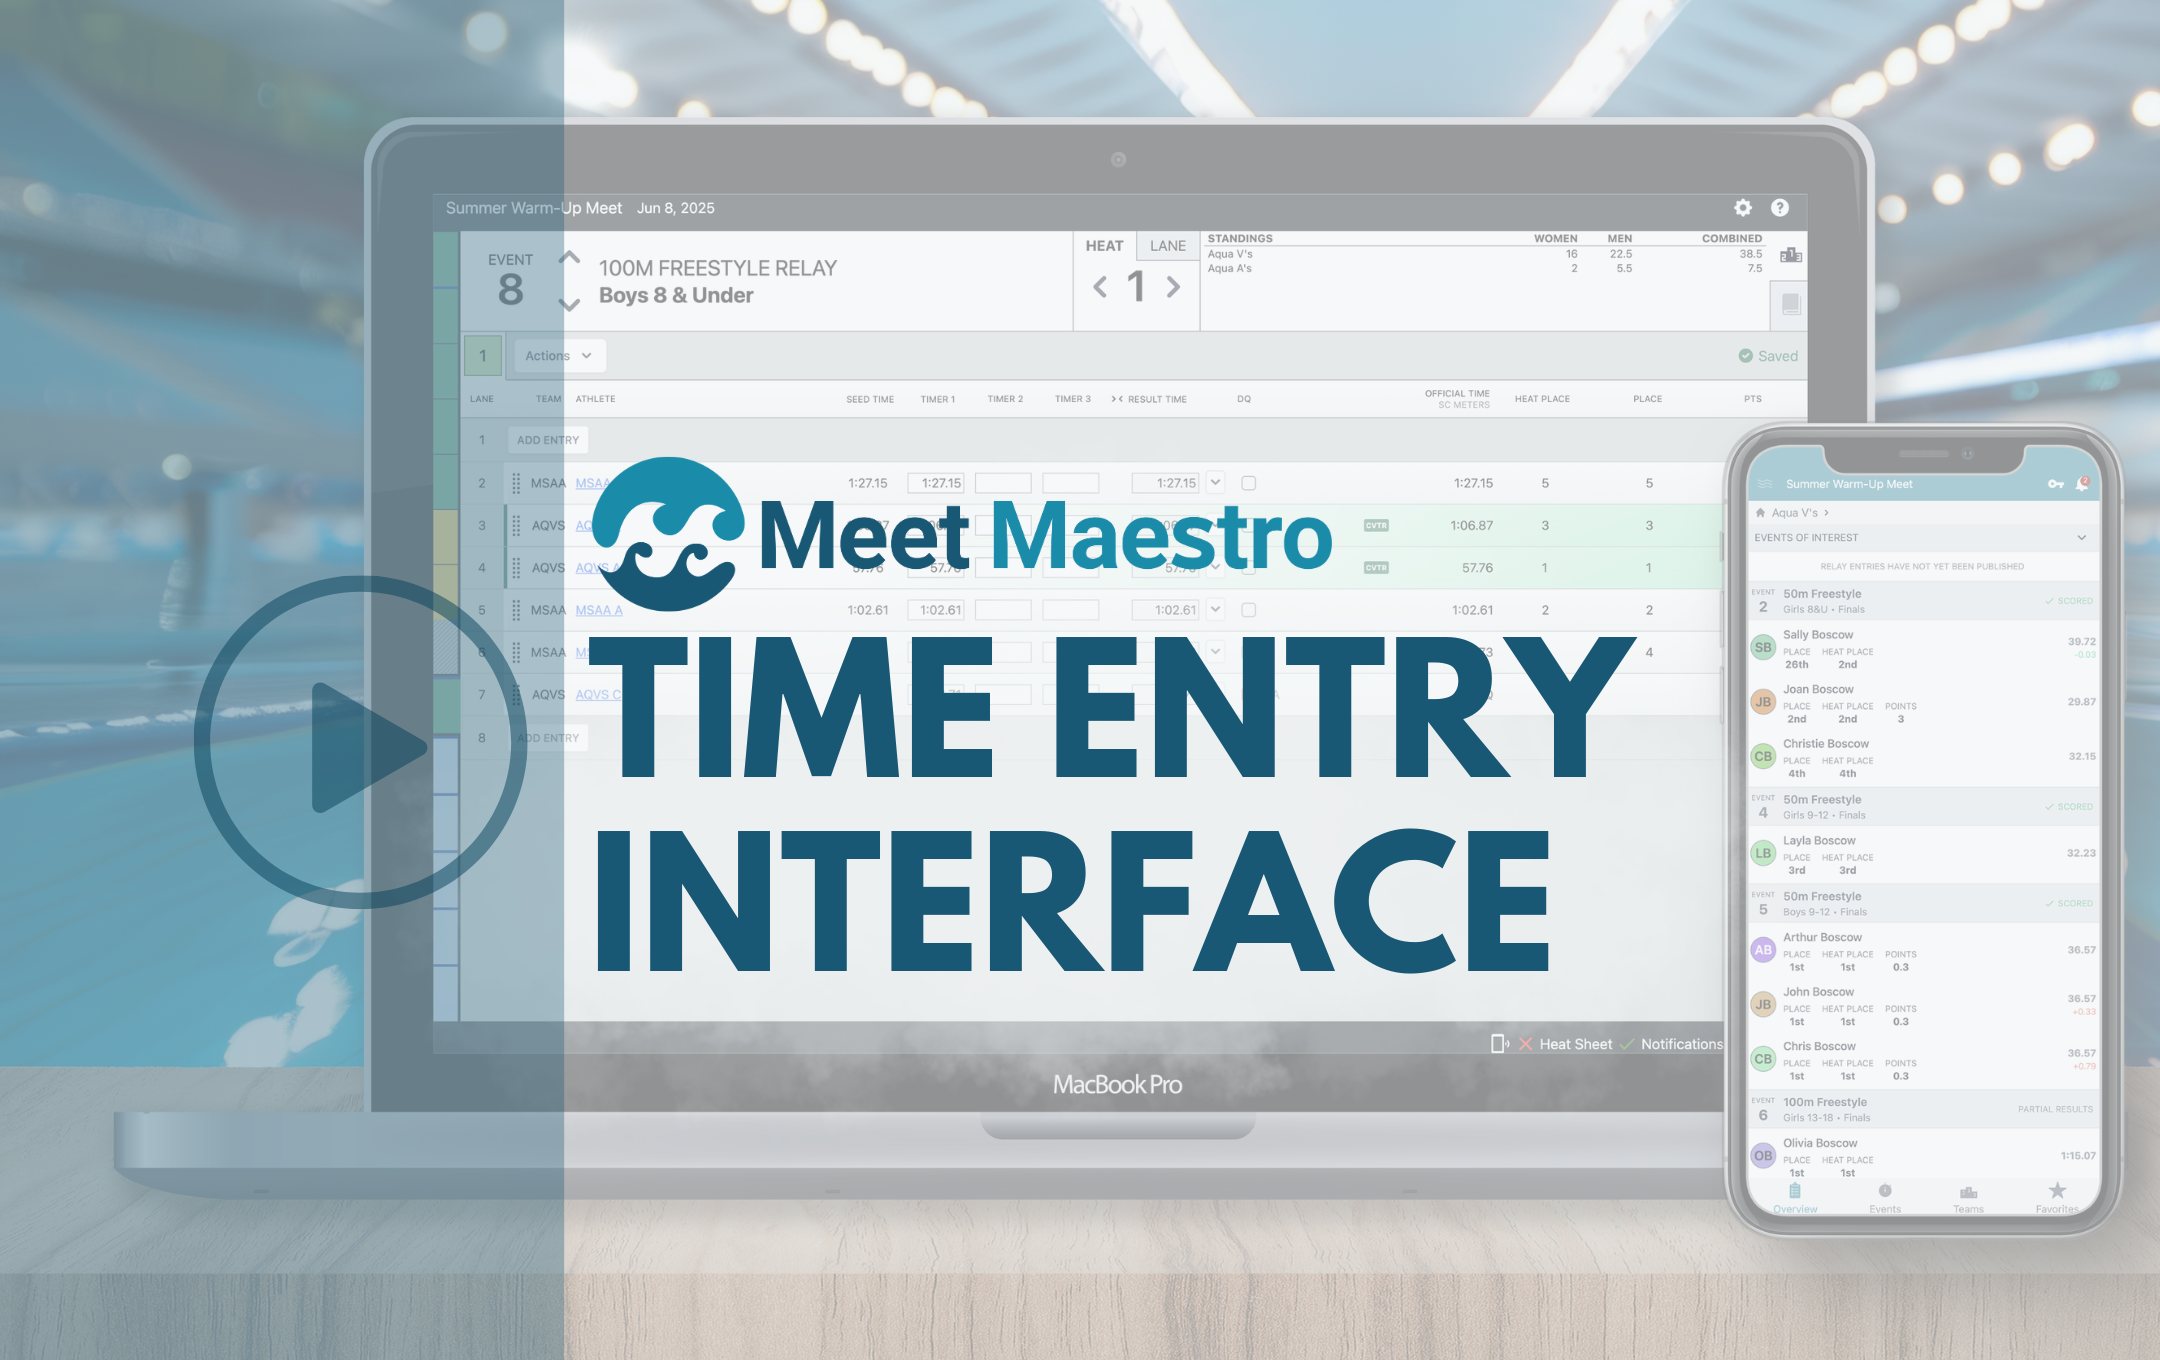
Our meet management software, Meet Maestro, was designed with one goal in mind: simplicity. The result? A powerful swim meet management tool that’s intuitive, easy to learn, and genuinely enjoyable to use. With a sleek modern interface and minimal learning curve, Meet Maestro saves time and dramatically reduces the need for training. Even better? It’s included free with your SwimTopia account.
This edition of our Tips and Tricks series is packed with helpful info—so grab a snack, kick back, and dive into everything you need to know about Meet Maestro’s Time Entry Interface.
Not using Meet Maestro yet? Click here to explore the many benefits it offers.
- Event Status Bar
- Heat View vs Lane View
- Navigating Events, Heats, and Lanes
- Deck Changes
- Entering Times
- Action Menus
- Changing the Number of Stopwatches
- Disqualifications (DQs)
- Team Standings and Benchmarks
- Additional Resources
Event Status Bar
The Event Status Bar, located in the left sidebar, gives you an instant overview of your meet’s progress. Each colored cell represents one event:
- Green = Scored (all data entered)
- Yellow = Partially complete
- Blue = Seeded but not started
- White = Unseeded
- Gray stripes = Scheduled break
Hover over any cell to view event details, or click to jump directly to that event. Dark blue dividers indicate a change in stroke or event type.
Heat View vs Lane View
Switch between Heat View and Lane View using the tabs at the top of your screen.
Heat View:
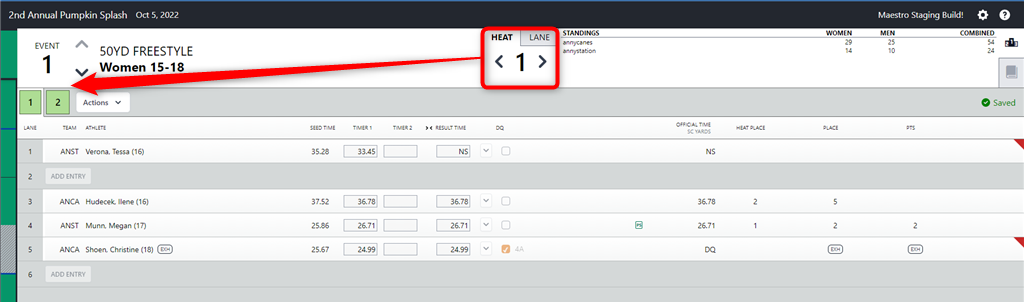
- The heat number is displayed in the Heat tab.
- Heats are shown in boxes below the event number.
- Each row displays the swimmers assigned to each lane for that heat.
- You can quickly move swimmers to different lanes within that heat by dragging and dropping the row to a new lane.
Lane View:
- The lane number is displayed in the Lane tab.
- All lanes are shown next to triangles (flags) below the event number.
- Each row displays the swimmers assigned to each heat within that lane.
- If timer sheets are printed by lane, this view will provide an efficient way to enter times as they arrive at the computer table.
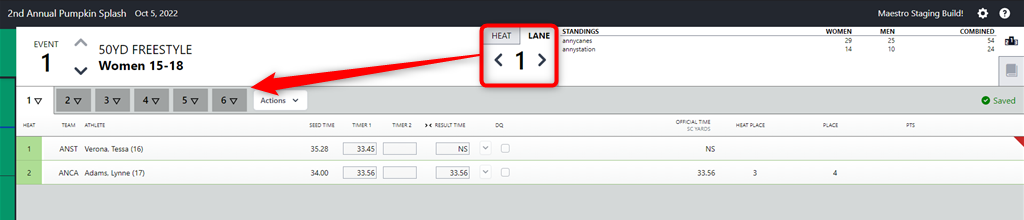
Navigating Events, Heats, and Lanes
We offer several options to easily navigate to different events, and then, within the events to different heats or lanes (depending on whether you’re in Heat or Lane view):
Events:

- Click directly on the event from the Event Status Bar
- Use the up/down arrows next to the event number
- Use keyboard shortcuts: Ctrl (PC) / Cmd (Mac) + ↑ or ↓
Heats/Lanes:

- Click the heat or lane number box
- Use the side arrows
- Use keyboard shortcuts: Ctrl (PC) / Cmd (Mac) + ← or →
Deck Changes
Making last-minute changes? No problem.
To add a swimmer to a lane, click the ADD ENTRY button in any open lane within a heat. Athlete selection is quick and efficient, as all available athletes will be listed first, and scratched and unavailable athletes will be shown at the bottom.
You can move athletes to different lanes within that heat by dragging and dropping the row to a new lane (hover over the left side of the row until your cursor looks like a cross). To review the different options for switching swimmers to a new heat, please read the following section in our Help Center: Athlete Heat/Lane Changes.
You can add a new Relay by clicking “ADD ENTRY” in an empty lane, or you can make edits to existing relays. You can add athletes, remove athletes, and drag and drop athletes in the desired order as designated below. To assist meet administrators and coaches as they make deck changes, a warning will display next to relays that are missing an athlete.
To make changes to a swimmer from the Time Entry Interface, you can click on their name in a heat where they appear. From there, you can uncheck the box next to the event number to remove them from the event, or you can click “Scratch Athlete” to remove them from the meet altogether. From here, you can also check the box next to an event to enter the athlete into a new event, then input the desired heat, lane, and entry time.
Meet Maestro currently allows adding any swimmer on the roster, without regard to attendance selections in SwimTopia, or eligibility for participation. To cross-check a swimmer’s attendance/participation and seed times, you can either have another browser window open to each team’s meet entries matrix screen in SwimTopia, or have the printed Meet Entry Matrix report handy.
Learn more about Individual Event – Entry Edits and Relay Event – Entry Changes in our Help Center.
Entering Times Made Easy
When inputting times, you don’t need punctuation (typing ‘12345’ will turn into “1:23.45″). Typing incorrect punctuation will be automatically corrected (“104.56” auto-translates to “1:04.56”). Inputting “DQ” or just “D” or “Q” will trigger the DQ entry window. Enter N or NS for “No Show,” F or DNF for “Did Not Finish,” and S or SCR for “Scratch.”
If you don’t enter a time or code for a swimmer, the event won’t be considered complete and will not be scored. To complete an event, every swimmer (who is eligible to score) must have either a time or code (NS, DQ etc.).
The software will place a yellow background in the box with a time that is out of acceptable tolerance. Follow your team or league rules related to times out of tolerance.
If the time entered is considered invalid, the software highlights the time box in red to alert the admin to make an edit.
Changing the Number of Stopwatches
Three Timer input fields will be displayed by default, but not all teams will need to use all three. If your team wishes to see fewer than three input boxes, this can be changed with a click of the timer visibility toggle (><) directly from the time entry header. The first two clicks will reduce the number of timer fields from 3 to 2 and then 2 to 1; the 3rd click will show all timers again.
Action Menus
Event Actions Menu
The dropdown menu at the end of the list of heats or lanes to perform some helpful actions related to the heat. Please review the following section in our Help Center for details about each of these actions: Event Actions Menu.
Results Action Menu
The results action menu provides quick access to add codes, clear codes, or adjust times. More information may be found here in our Help Center about each of these actions: Results Actions Menu
Disqualifications (DQs)
Checking the “DQ” box next to the time entry interface opens a window to check the DQ Reason. Select the DQ Reason (or click the “No Reason” button if no reason is specified), then click “OK” to save the DQ. When entering a DQ for a multi-leg event such as a Relay or the Individual Medley, if a leg-specific stroke infraction is selected, you will be prompted to enter a secondary DQ Reason for that leg.
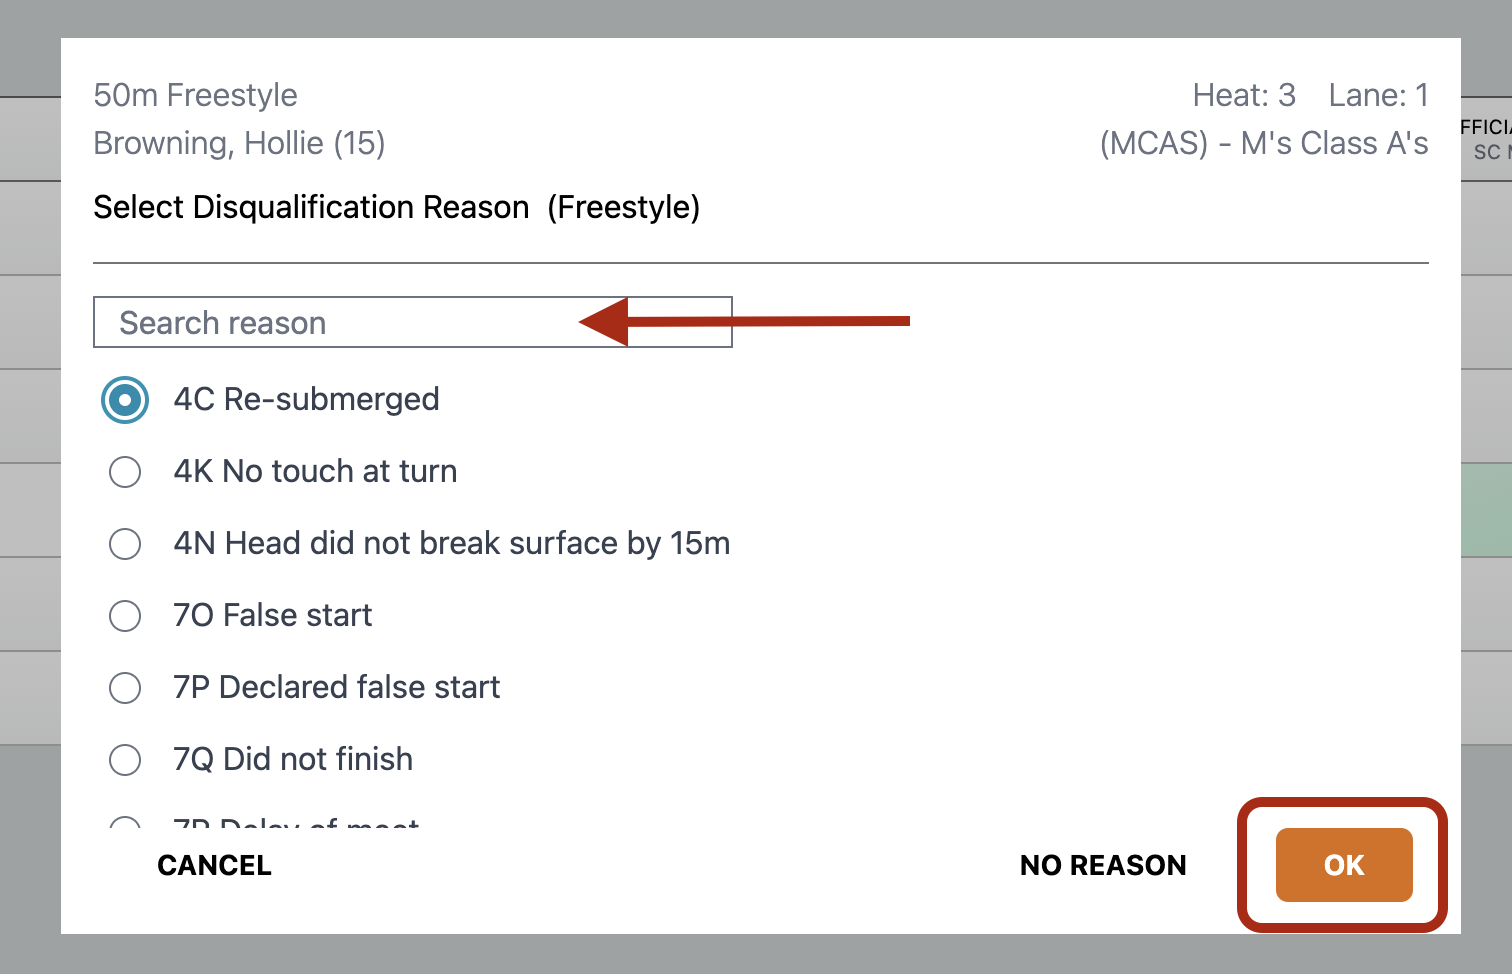
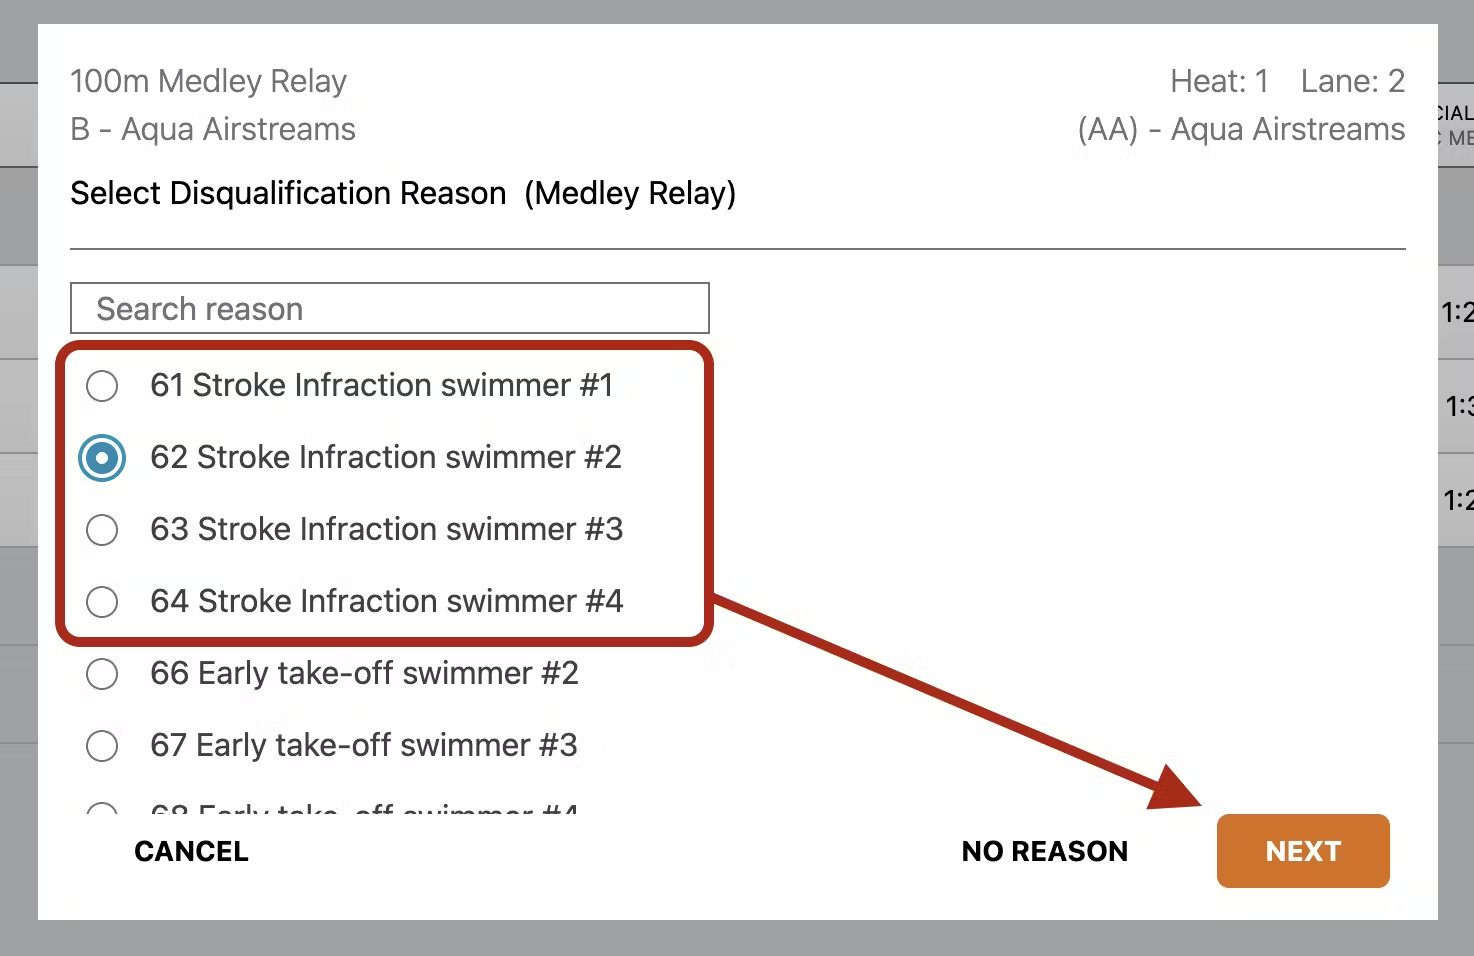
Hovering your mouse over the DQ checkbox or DQ Code will display a pop-up summary listing all selected DQ Reasons. The watch times will remain in case the DQ is overturned (or was entered in error), but the official time will show as a DQ.

Team Standings and Benchmarks
You can see the team scores in the Standings window, which will continuously update as the meet progresses.
If Record Books or Time Standards are configured in the meet, they will be displayed in the Benchmarks window, which you can see when you select the book icon. These will reflect the current records or time standards, and they’ll be highlighted when an athlete breaks a record or achieves a time cut.
As records are broken, new records will be displayed within the event heat and lane, as indicated by a green lane highlight and a solid green badge with the associated record book.
As the meet progresses, when a time cut is achieved, the applicable Time Standard label will display as a green-outlined badge next to the Official Time.
Additional Resources:
Let Meet Maestro do the heavy lifting so your meets run smoother, faster, and smarter than ever. You may also find the following information helpful:
Published 05/14/2025. SwimTopia regularly releases new features, enhancements, and updates. Please visit our Help Center for the latest information on Setting Up Your Meets.